Solve the red, green, blue or grey tint visible in your display output to achieve accurate colors

Introduction
Whether you are using your PC monitors for content consumption, office work, professional projects or gaming, you should want accurate color output.
Most of the monitors available today ($250+ new) are able to display the colors we are used to rather accurately [A/N: Of course there are expensive hardware color calibrated models available, tuned to the sRGB, DCI-P3 or other color spaces, but these are built for scenarios when you need to work on color-accurate material, so any normal user will be happy with the cheaper models that don't have that calibration], but wrong settings in the operating system or monitor itself can change a good looking image into a horrendous-looking one.
Today we will discuss such a wrong setting that will severely limit the color output of any monitor.
Symptom
Take a look at the following image:
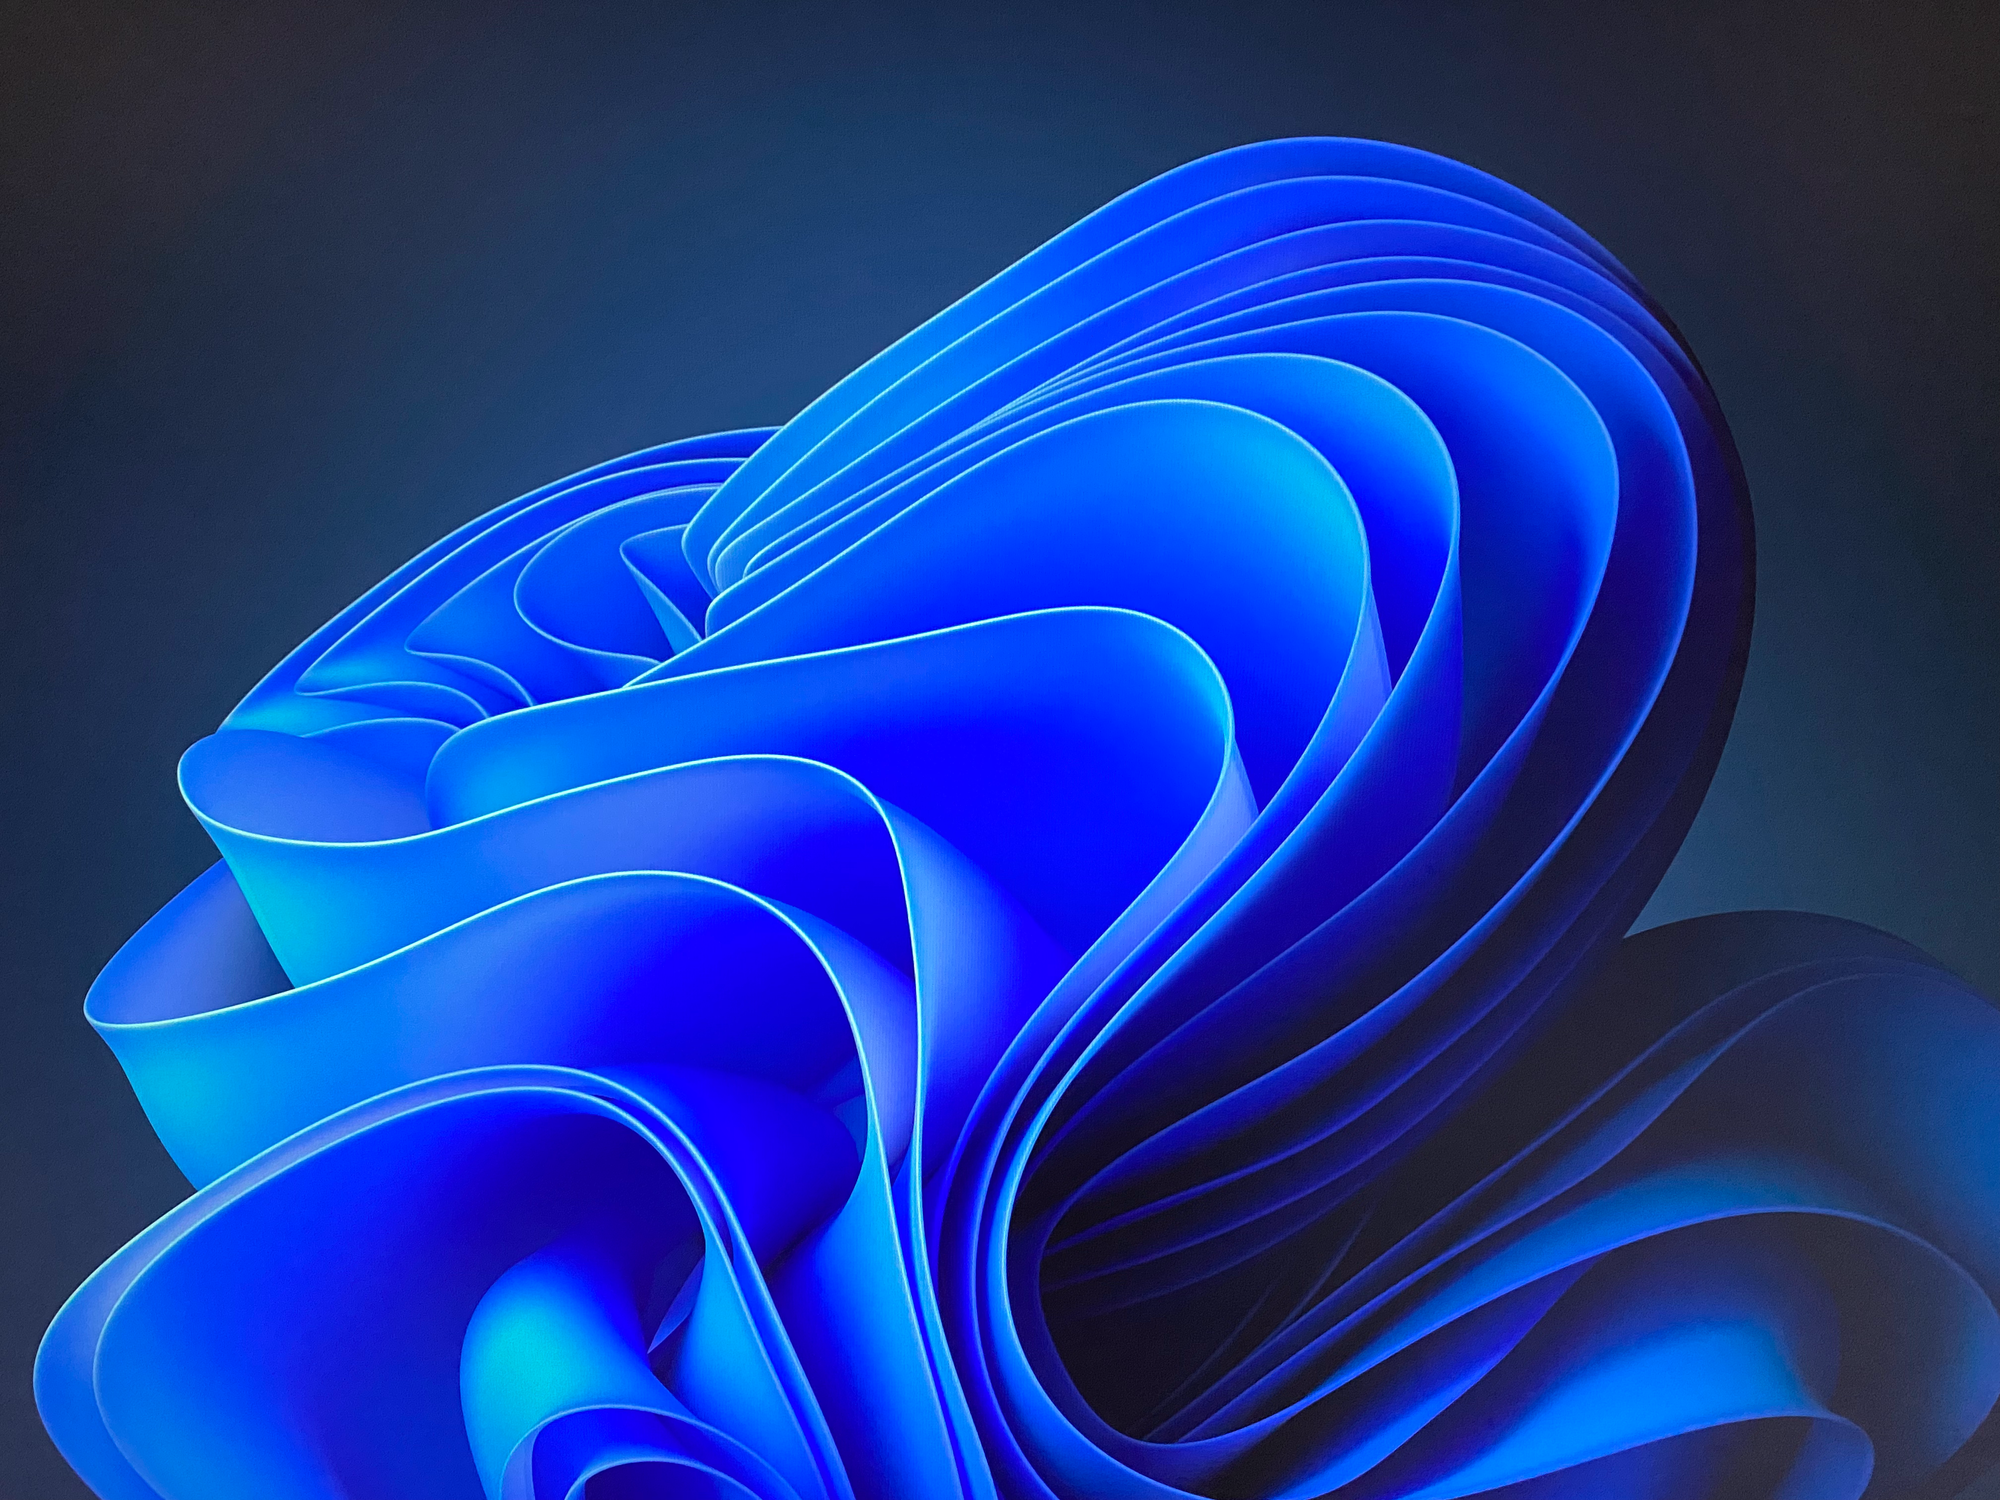
This is a photo taken by an Apple iPhone 11 Pro Max with default settings, portraying the Windows 11 default dark mode background image, displayed by a Dell G3223Q, a hardware calibrated 32 inch 4K 144 Hz gaming monitor.
Now, let's look at this image:
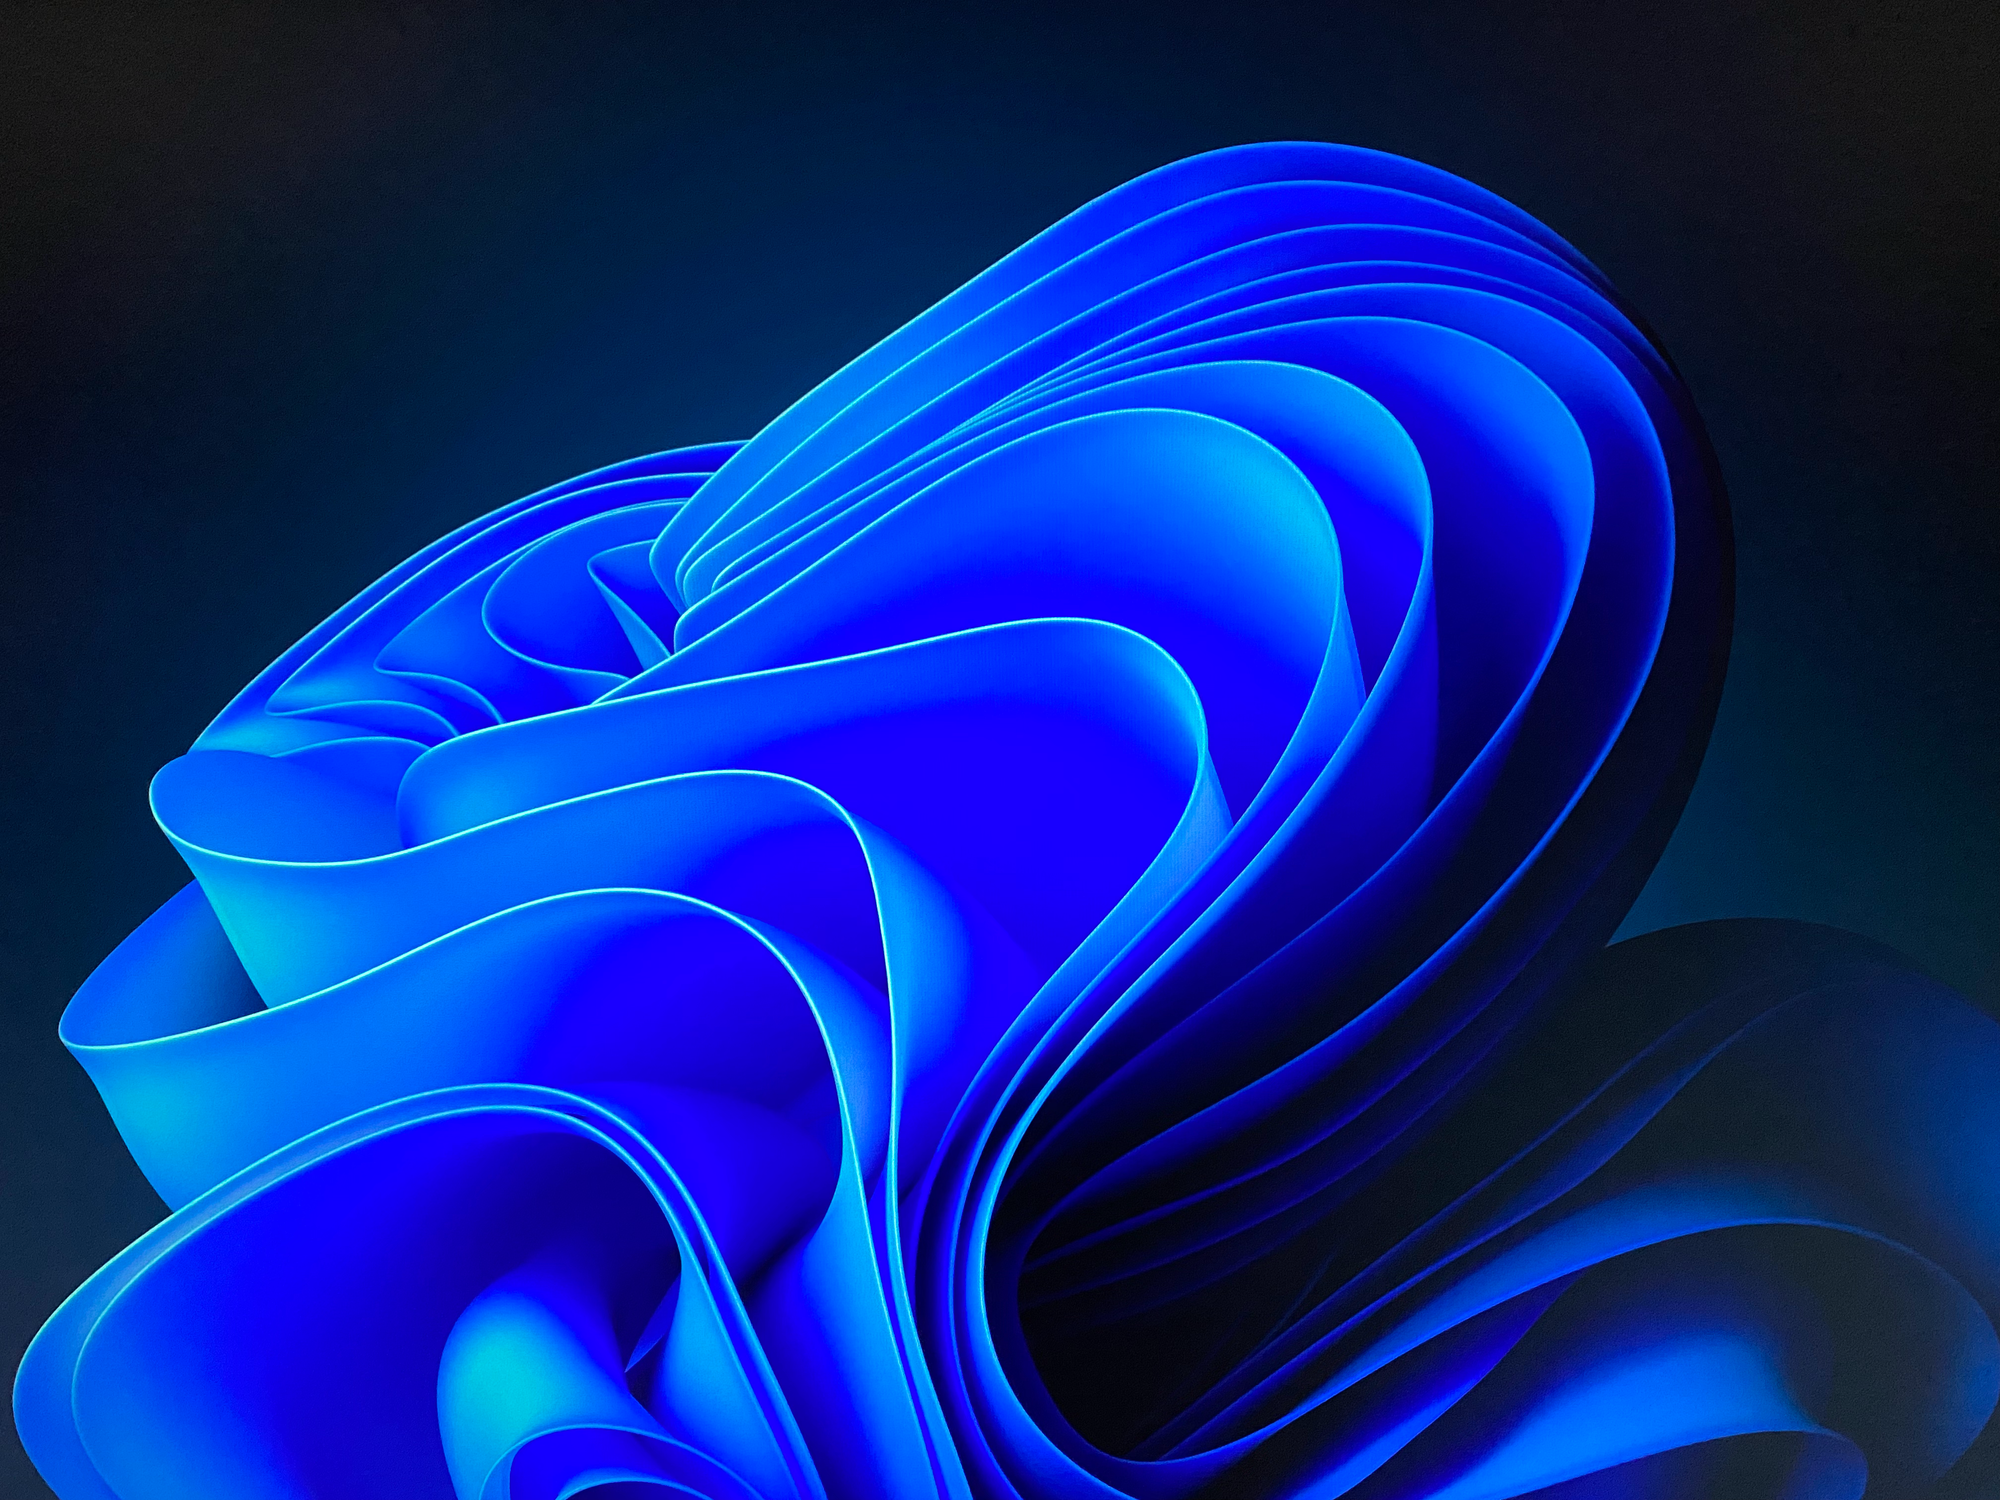
Same setup as before (Photo taken by Apple iPhone 11 Pro Max with default settings, portraying the Windows 11 default dark mode background image, displayed by a Dell G3223Q, a hardware calibrated 32 inch 4K 144 Hz gaming monitor.)
Notice the difference?
The first image has a very noticeable grey tint and the blacks are much too bright. [A/N: The difference is elevated in this example since the captured image is taken by a phone].
And remember that I said this is a hardware calibrated monitor, so it was especially prepared to display accurate colors, so why doesn't it do that?
The effect shown here can have many reasons, from wrongly adjusted color settings in the monitors OSD to wrong brightness or contrast. But most of the time, it's actually a not-well-known operating system setting that causes this. [A/N: If the steps outlined here still don't fully solve the wrong color output, reset your monitor to factory defaults and adjust the brightness to a comfortable level (not 75!) again, this will clear any changed color adjustments on the monitor level]
And this setting in question is called Output dynamic range, it decides what color range the monitor receives to display to the user. So the graphics card of the computer only makes a certain color range (16 to 235 to be exact, also called Limited) available to the monitor, instead of the Full range (0 to 255). And that is exactly why the hardware calibration doesn't matter. If the monitor doesn't receive any image data that requests "true blacks" (0), then it won't output that. The same happens with true white (255).
If you want to know a bit more about the values mentioned above in the parentheses (0, 16, 235, 255), then read on, if not, skip to Solution.
Colors in the RGB color space can be represented by a combination of three distinct values, each ranging from 0 to 255 (also called chromaticity coordinates of the red, green, and blue additive primaries), one standing for each of the "main" colors, Red, Green and Blue [Do you now know what RGB means?], like this (Red: 0-255, Green: 0-255, Blue: 0-255), resulting in 16.777.216 (16.8 million) displayable colors [result of the multiplication of all RGB values, 256*256*256].
For example, true Red can be defined as (255, 0, 0), meaning 100% Red, no Green or Blue. The same goes for true Green (0, 255, 0), or true Blue (0, 0, 255). The first value of the three is always the red primary, the second one the green primary and the third one the blue primary.
Black is therefore (0, 0, 0) since its essentially the absence of all colors, and white is (255, 255, 255), the presence of all colors.
Now with this knowledge we can explain what the values 0, 16, 235 or 255 represent.
These dynamic range values combine three same-value RGB coordinates into one so the dynamic range value 0 actually tells us
(0, 0, 0), so true Black, 16 means (16, 16, 16), a greyish black, 235 is (235, 235, 235), a greyish white and 255 is (255, 255, 255), which is true White.
So, to close off this deep dive, the Limited dynamic range stops the color range "to the left of the scale" at a greyish black as the darkest color available and "to the right of the scale" at a greyish white as the brightest color (16 to 235).
And that is why Image 1 looks so grey and the blacks are too bright.
The Windows 11 dark mode background image contains a lot of blacks that can't be displayed as true Blacks since the RGB range can't reach (0, 0, 0), only (16, 16, 16) as its darkest color.
Now, what can we do about it?
Solution
The Output dynamic range is defined by the operating system of choice, within the graphics driver settings. The driver actually auto-detects the correct value for the connected display and sets it accordingly. However, this automation can sometimes be wrong, or else we wouldn't be here.
To change it, open the graphics card control panel of your graphics card manufacturer (Intel, AMD, Nvidia) and look for this setting that can either have Limited or Full as its possible values.
With Nvidia, you have to open the NVIDIA Control Panel and go to Change Resolution in the Display category. In there, select the monitor at the top you want to change the setting for, and at the bottom, there is a section called
3. Apply the following settings.
By default, the option active here is Use default color settings, which disables the possibility of changing Output dynamic range. So select Use NVIDIA color settings instead and the section will look like this:
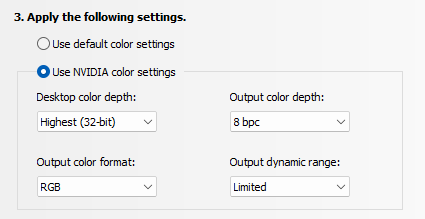
Now change Output dynamic range to Full
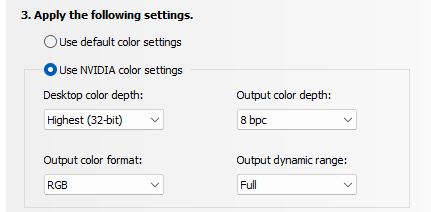
and click Apply in the bottom right.
Your monitor will go dark momentarily and you should now have the correct color output your monitor is capable of.
Now go ahead and appreciate your newfound colors ;)
You don't pay any extra for the usage of these links.
Thank you for supporting the author and this blog!