Definitive Guide on Cloudflare Redirects


Introduction
During the last few months, when I started solving problems for many different people in the https://www.reddit.com/r/CloudFlare/ sub-reddit, I mostly saw threads asking for help about the Cloudflare Page Rules, the Forwarding URL setting and how to achieve a redirect setup with the combination of both.
So today, I will lay out a complete guide for anyone having questions about how to achieve redirects with Cloudflare. Keep in mind though, since Cloudflare launched their new plan today on how they want to discontinue the classic Page Rules in the future (read https://blog.cloudflare.com/future-of-page-rules/), we will mainly talk about the freshly-built Dynamic Redirects, which will supersede the Forwarding URL feature within Page Rules. We will also do a small excursion on how to use Bulk Redirects if many equally-structured redirects are needed.
Before we jump in, we have to first lay the groundwork by talking about the necessary DNS records you have to configure, because without them, neither Dynamic nor Bulk Redirects will work, since Cloudflare won't know when to act.
Navigate to: Prerequisite: DNS Records | Dynamic Redirects | Bulk Redirects
Prerequisite: DNS Records
Like I said in the Introduction paragraph, we first have to talk about the required DNS records you have to create within your Cloudflare DNS zone so any other Cloudflare feature can go to work.
The reason we need DNS records at all is twofold:
- Your computer, or any in our universe for that matter, won't know how to reach a website like google.com if no DNS record exists for it. DNS is responsible for converting the human-readable google.com into 142.250.185.238 (or any other Google Load Balancer IP responsible for delivering the Google Search Engine main page), the IPv4 address our computers can understand
- Cloudflare can't respond to any request being sent to a webpage or DNS record if their systems are not being allowed to proxy the request and send it through their tech stack:

The scheme of the DNS record is always the same, we need one A record and one AAAA record.
An AAAA record is another type of DNS record that does the same as an A record, but instead resolves to an IPv6 address, so like fd0f:b9e8:4cd7:6175:2958:6485:3615:9768.
So the Type of the two DNS records will be A and AAAA, respectively, the Name will differ depending on the requirements, the Content is fixed, more on that later, Proxy status HAS to be Proxied, and TTL should be Auto.
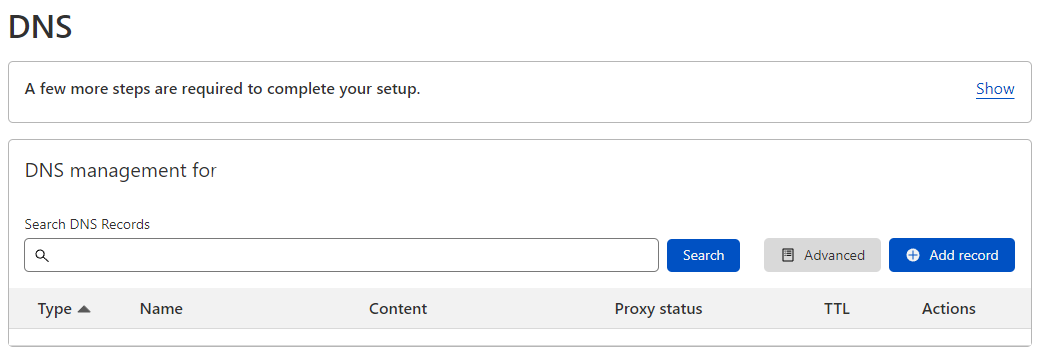
To create the DNS records, open https://dash.cloudflare.com/, click on the zone name you want to use for redirects, and click on DNS in the left nav bar. You will be greeted by the DNS management for the selected domain/zone:
I will provide two examples to go through the creation process of the records themselves.
Example 1 would be configured when you have a second domain that is used for a SaaS app your company develops for example, but you want your users to hit your main website when they call that second domain in their browsers.
Example 2 is helpful when you lease a SaaS from another provider but you can't use custom domains with them, so the app runs under acme.zendesk.com for example. The redirect in this case enables your users to call a trusted subdomain of your company and they don't have to remember the tenant-specific domain of the SaaS app.
1. Record Name
The @ in the Name is a variable Cloudflare DNS and many other DNS products use to reference the apex domain of the zone. Apex domains, also called Root domains, are acme.org, contoso.com, google.com, just to name a few.
In technical terms, apex domain describes the combination of a domain name (e.g. "google") with a TLD, Top-Level-Domain (e.g. "com"), delimited by a dot.
You could also enter your zone's domain into the Name field for the record, but since you are configuring your specific zone, the @ will do that for you since the system already knows the domain and can reduce the typing necessary.
2. Record Content
As I said above, the content of the record is fixed. The reason for that comes from the type of redirects we configure in this guide, which are called originless redirects. Originless means that you don't have a dedicated server or PaaS system enabled to receive the incoming web requests. Cloudflare is acting as that system and, at least in this specific configuration, redirects the requests to another origin.
It can be confusing to read that the origin is the server receiving the requests, rather than the user, the one the requests originate from, but the view in effect here is top-down, starting from the system serving the website, so the website data originates from the server, therefore called origin.
The content for the A record is always 192.0.2.1, the first available IP from the IANA IPv4 TEST-NET-1 192.0.2.0/24, described in https://www.ietf.org/rfc/rfc5737.txt.
The content for the AAAA record is always 100::, the first available IP from the IPv6 discard prefix 100::/64, described in https://www.ietf.org/rfc/rfc6666.txt.
Example 1
We want acme.org and www.acme.org to redirect to contoso.com.
So we need the following DNS records:
Type: A | Name: @ | Content: 192.0.2.1 | Proxy status: Proxied | TTL: Auto

Type: A | Name: www | Content: 192.0.2.1 | Proxy status: Proxied | TTL: Auto

Type: AAAA | Name: @ | Content: 100:: | Proxy status: Proxied | TTL: Auto

Type: AAAA | Name: www | Content: 100:: | Proxy status: Proxied | TTL: Auto

Example 2
We want support.acme.org to redirect to acme.zendesk.com.
So we need the following DNS records:
Type: A | Name: support | Content: 192.0.2.1 | Proxy status: Proxied |
TTL: Auto

Type: AAAA | Name: support | Content: 100:: | Proxy status: Proxied |
TTL: Auto

Dynamic Redirects
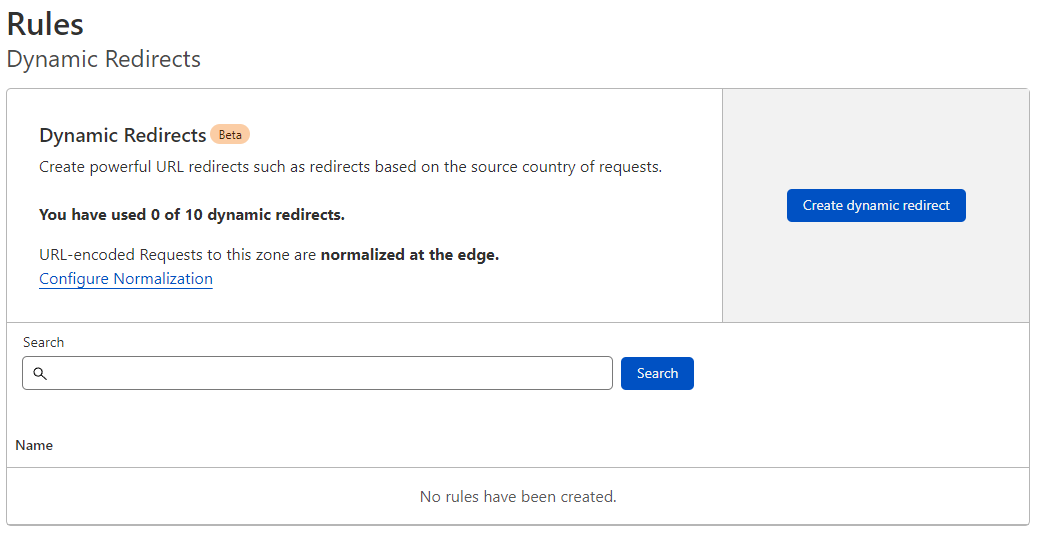
With DNS records out of the way, lets start the paragraph about Dynamic Redirects, the second part of the two part puzzle of redirects. To configure them, open https://dash.cloudflare.com/, click on the zone name you want to use for redirects, click on Rules and then on Dynamic Redirects in the left nav bar. You will be greeted by the Dynamic Redirects management for the selected domain/zone:
We will use the same two examples as with the DNS record creation above. To remind you, these were the expected results:
- Example 1: We want acme.org and www.acme.org to redirect to contoso.com
- Example 2: We want support.acme.org to redirect to acme.zendesk.com
In addition to the already demonstrated two examples we will configure a third one to demonstrate how we can keep the URI path intact, even through the redirect.
Example 1
We want acme.org and www.acme.org to redirect to contoso.com.
So we need the following dynamic redirect:
Rule Name: 302 Redirect WWW & Apex to contoso.com
When incoming requests match...
Field: Hostname
Operator: equals
Value: www.acme.org
OR
Field: Hostname
Operator: equals
Value: acme.org
Expression Preview
(http.host eq "www.acme.org") or (http.host eq "acme.org")Then...
Type: Static
URL: contoso.com
Status code: 302

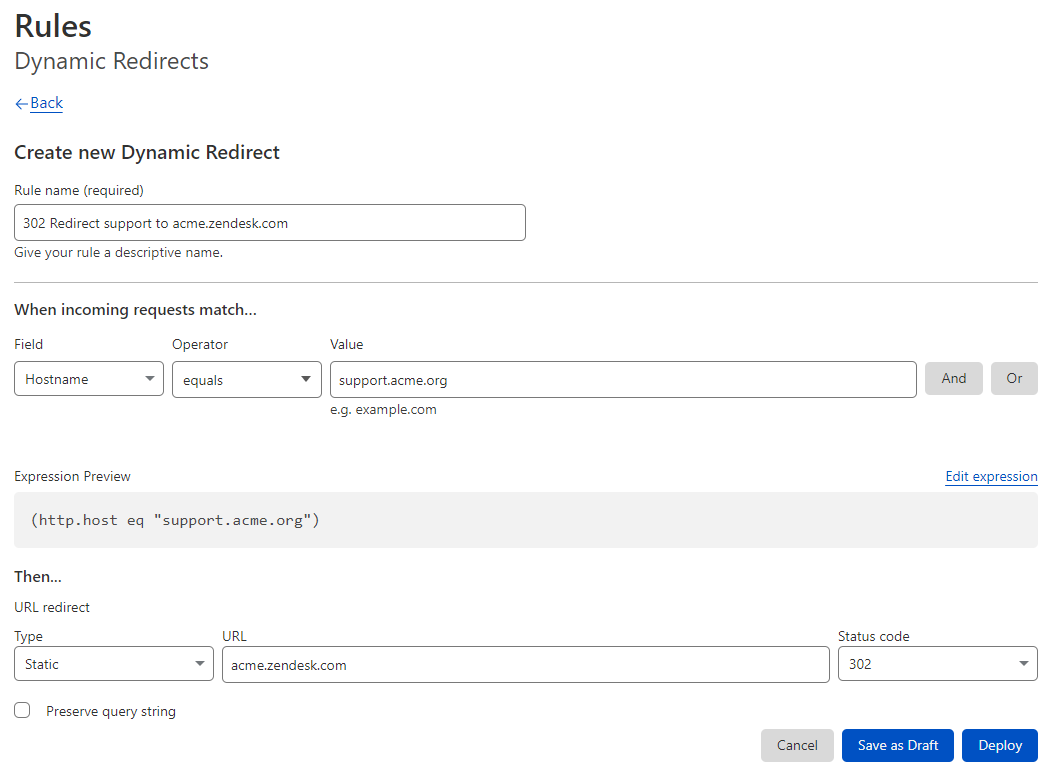
Example 2
We want support.acme.org to redirect to acme.zendesk.com.
So we need the following dynamic redirect:
Rule Name: 302 Redirect support to acme.zendesk.com
When incoming requests match...
Field: Hostname
Operator: equals
Value: support.acme.org
Expression Preview
(http.host eq "support.acme.org")Then...
Type: Static
URL: acme.zendesk.com
Status code: 302
Example 3
This third example needs a bit more explanation because it is new.
We want to configure a subdomain redirect that can work with URI paths supplied with the user request.
One possible use case is a "github" subdomain pointing to an organization and it should dynamically navigate to the repository called behind the trailing slash of github.acme.org/.
Another use case is the implementation of aliases, e.g. "partner", "partner-welcome" or "consort" for a webpage named "partners", available under acme.org/partners, so users can call all four URI paths and still land on the right page.
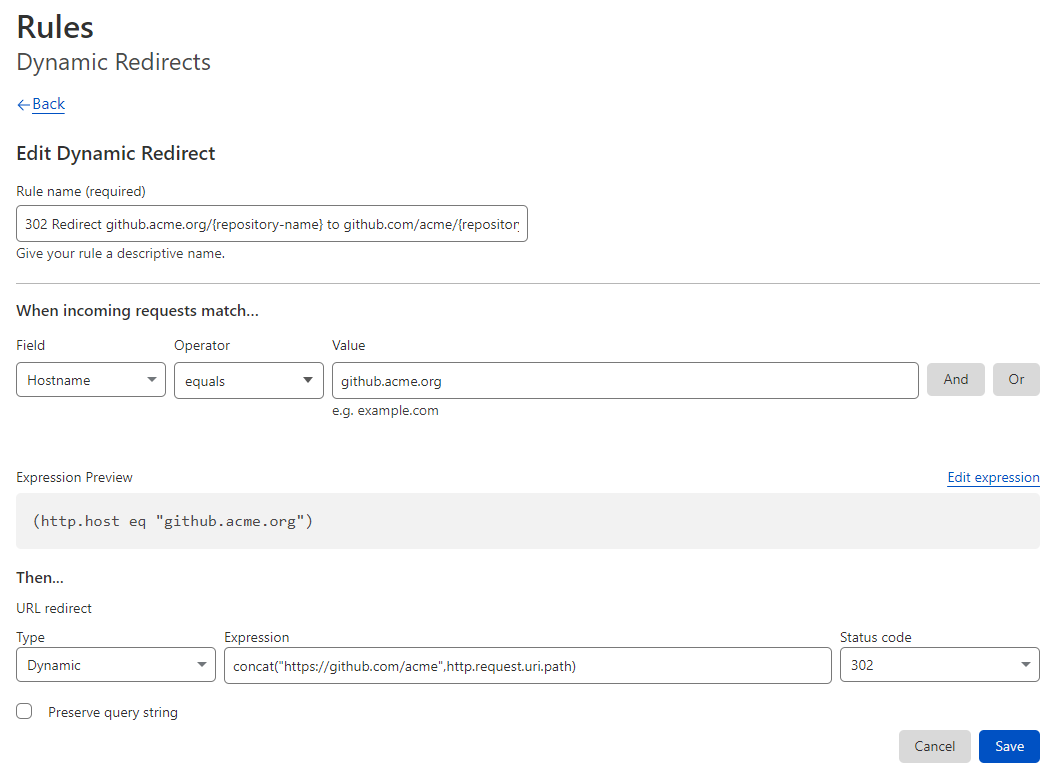
So for our mission statement, explaining the implementation of the first use case:
We want github.acme.org/{repository-name} to redirect to github.com/acme/{repository-name}.
So we need the following dynamic redirect:
Rule Name: 302 Redirect github.acme.org/{repository-name} to github.com/acme/{repository-name}
When incoming requests match...
Field: Hostname
Operator: equals
Value: github.acme.org
Expression Preview
(http.host eq "github.acme.org")Then...
Type: Dynamic
Expression: concat("https://github.com/acme",http.request.uri.path)
Status code: 302
Bulk Redirects
Now, for the last section of this guide, we will quickly talk about Bulk Redirects. Bulk Redirects are account-based, so the link is directly found in the nav bar of https://dash.cloudflare.com/ this time. You will arrive here:
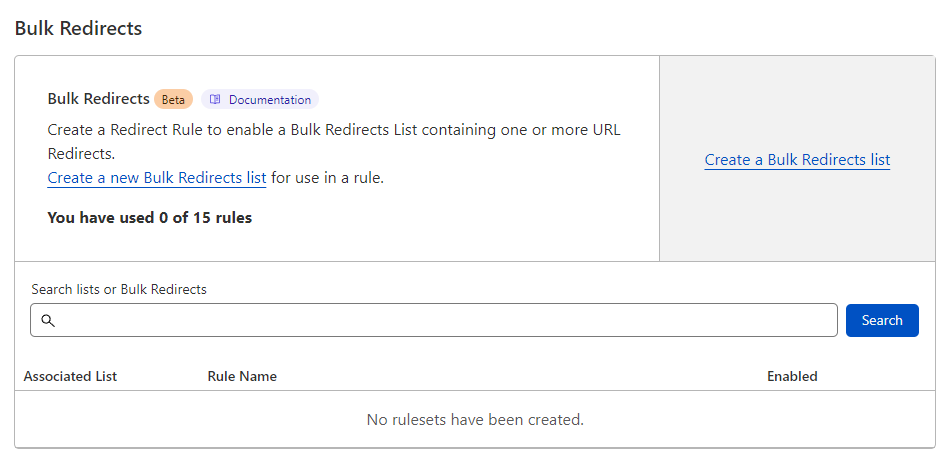
Bulk Redirects have two necessary parts, the Bulk Redirect lists and the Bulk Redirect rules themselves. The lists lay the groundwork, how the source and target URLs look like and which basic features (Preserve query string, Include subdomains, Subpath matching, Preserve path suffix) should be enabled; the parameters are explained here (https://developers.cloudflare.com/rules/url-forwarding/bulk-redirects/reference/parameters/) in more detail. The rules define when a list will be executed.
We will implement our previous three examples again:
- Example 1: We want acme.org and www.acme.org to redirect to contoso.com
- Example 2: We want support.acme.org to redirect to acme.zendesk.com
- Example 3: We want github.acme.org/{repository-name} to redirect to github.com/acme/{repository-name}
We only need one Bulk Redirect list and one Bulk Redirect rule to achieve this, so no steps split by the different examples necessary.
Configure the list
Create a new list by going to https://dash.cloudflare.com/, Manage Account, Configurations and then Lists.
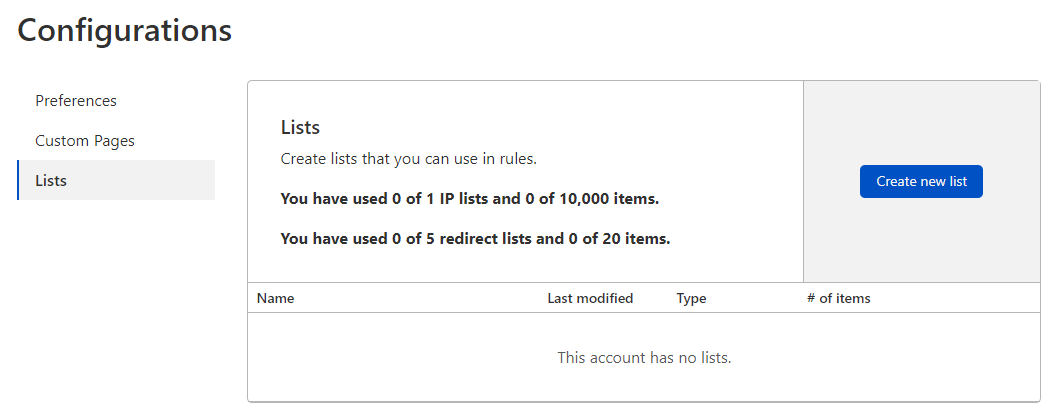
Give it a name and select Redirect as Content Type.
It will now ask for the items the list should contain:
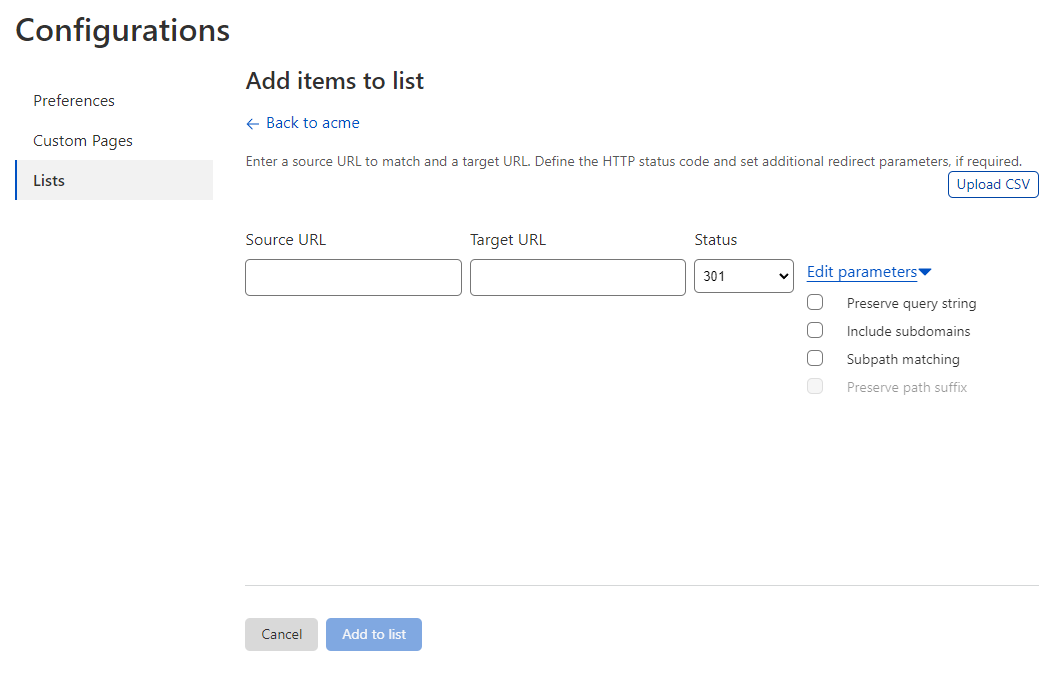
You can either input the entries manually or upload a CSV. The CSV format has to match the following column map (only <SOURCE_URL> and <TARGET_URL> are mandatory):
<SOURCE_URL>,<TARGET_URL>[,<STATUS_CODE>,<PRESERVE_QUERY_STRING>,<INCLUDE_SUBDOMAINS>,<SUBPATH_MATCHING>,<PRESERVE_PATH_SUFFIX>]Since we only need three entries, we will input them manually:
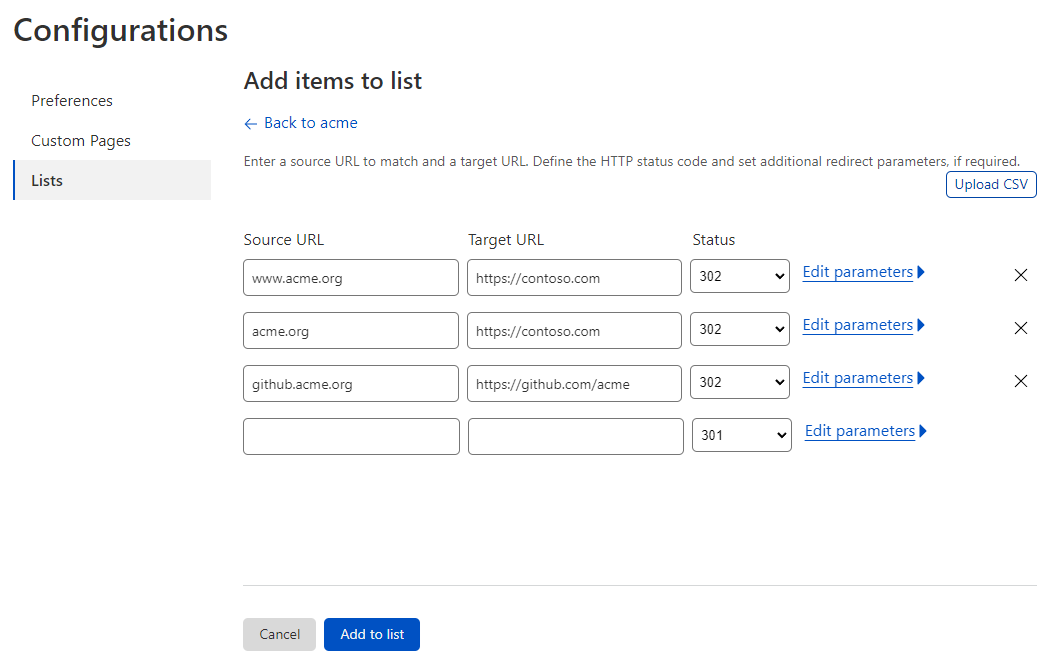
We don't need any of the parameters so they are not included in the screenshot.
Configure the rule
Lastly, we will configure the rule itself, go to https://dash.cloudflare.com/ and then Bulk Redirects, as shown at the beginning of the paragraph.
Create the rule:
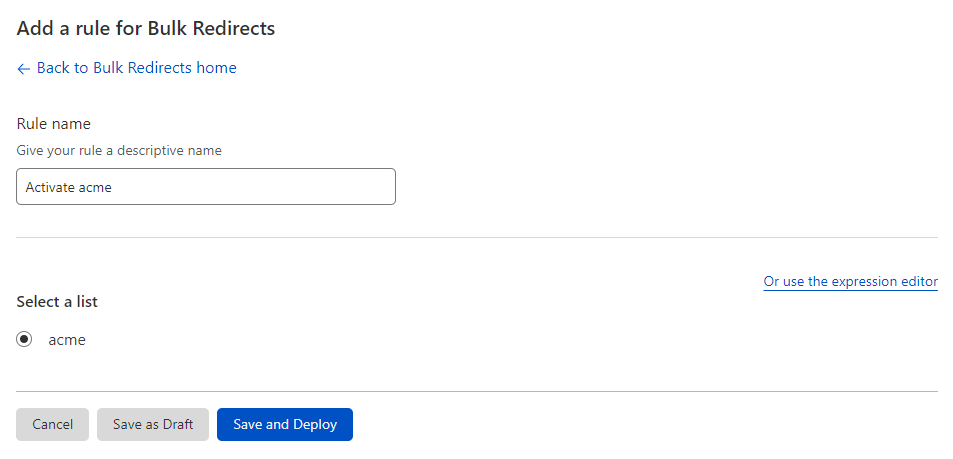
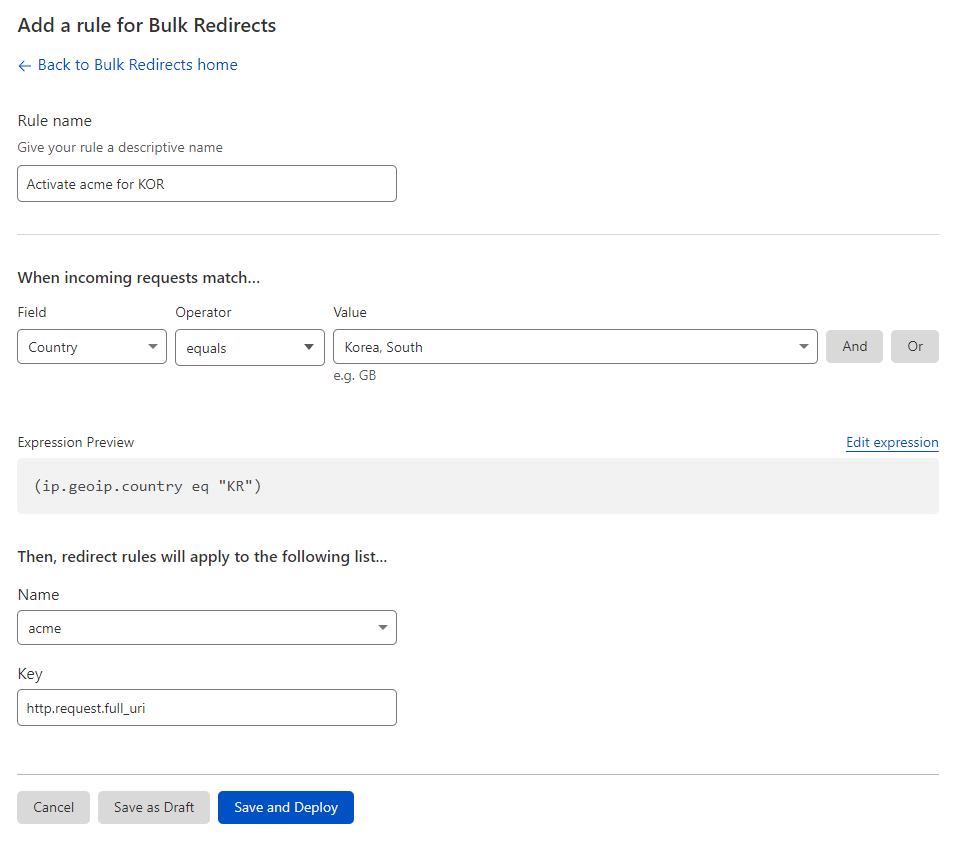
In our case, a simple activation by mentioning the list, shown above, is sufficient, but if you ever need something more exotic, the expression builder is available here too:
You don't pay any extra for the usage of these links.
Thank you for supporting the author and this blog!