RfC: How to use Amazon SES with Ghost CMS correctly


Introduction
Ghost CMS categorizes the mails generated and sent by it into two categories, transactional, like user invites or password reset requests, and bulk, like newsletters created by the staff.
Due to the nature of bulk emails like newsletters (high risk of getting flagged as spam if untrustworthy, not high enough sender reputation, etc.), Ghost CMS does not allow you to use your own SMTP server (like Amazon SES) for that, it only allows the usage of Mailgun, a SaaS product specializing in successfully delivering your newsletters you send with Ghost.
So why are we talking about SES at all then if it is not used for bulk emails? Because your Ghost CMS still needs to send transactional mails (examples were given in the first paragraph). And for that, SES is perfectly usable and recommended by me.
But the reason why you are reading this, as with all my Request for Change posts, is that someone has made an error in their documentation (in this case, the dev team behind the Ghost CMS) I have to correct so you, the user and admin of their own Ghost CMS installation, can actually succeed in the configuration of SES on your server.
Let's get into it.
Content of RfC
To be able to follow the steps we will talk about, you need a working and up-to-date Ghost CMS installation (for a definitive update guide, read here) and also a configured Amazon SES tenant with a trusted identity with which you want to send the transactional emails generated by Ghost.
1. Log in to your server where Ghost is installed through SSH with your non-root user, that has sudo permissions
2. Change into the directory where you installed Ghost, by default a sub-folder (with the name of your site as its name) within /var/www/
3. In there, you will find the file config.production.json, open it with your text editor of choice
4. The file will look like this after a fresh install:
{
  "url": "https://url-of-your-site",
  "server": {
    "port": 2368,
    "host": "127.0.0.1"
  },
  "database": {
    "client": "mysql",
    "connection": {
      "host": "localhost",
      "user": "db-user-for-ghost",
      "password": "password-of-the-db-user",
      "database": "site-name_prod"
    }
  },
  "logging": {
    "transports": [
      "file",
      "stdout"
    ]
  },
  "process": "systemd",
  "paths": {
    "contentPath": "/var/www/site-name/content"
  }
}url-of-your-site, db-user-for-ghost, password-of-the-db-user and site-name are placeholders which will have the values that were set during the installation in your own file.
5. Now, after line 15, we will have to paste this config snippet
  "mail": {
    "from": "hello@url-of-your-site",
    "transport": "SMTP",
    "options": {
      "service": "SES",
      "host": "email-smtp.ses-region.amazonaws.com",
      "port": 465,
      "secure": true,
      "auth": {
        "user": "iam-smtp-user-for-amazon-ses",
        "pass": "password-of-the-iam-smtp-user"
      }
    }
  },
so your config.production.json will look like the following now:
{
  "url": "https://url-of-your-site",
  "server": {
    "port": 2368,
    "host": "127.0.0.1"
  },
  "database": {
    "client": "mysql",
    "connection": {
      "host": "localhost",
      "user": "db-user-for-ghost",
      "password": "password-of-the-db-user",
      "database": "site-name_prod"
    }
  },
  "mail": {
    "from": "hello@url-of-your-site",
    "transport": "SMTP",
    "options": {
      "service": "SES",
      "host": "email-smtp.ses-region.amazonaws.com",
      "port": 465,
      "secure": true,
      "auth": {
        "user": "iam-smtp-user-for-amazon-ses",
        "pass": "password-of-the-iam-smtp-user"
      }
    }
  },
  "logging": {
    "transports": [
      "file",
      "stdout"
    ]
  },
  "process": "systemd",
  "paths": {
    "contentPath": "/var/www/site-name/content"
  }
}
Once again, the same placeholders as above (url-of-your-site, db-user-for-ghost, password-of-the-db-user and site-name) were used, but I had to add some additional ones, which you have to exchange now like so:
- ses-region : Fill this in with the subdomain which is listed in your Amazon SES dashboard. For example, the full value for the host option, if you are using SES within the Frankfurt region of AWS, would be email-smtp.eu-central-1.amazonaws.com
- iam-smtp-user-for-amazon-ses : Fill this in with the username SES generated for you when you created your SMTP credentials. It should be 20 characters long and comprised of a mixture of upper-case letters and numbers
- password-of-the-iam-smtp-user : Fill this in with the password which was given with the aforementioned SMTP user from SES
6. Save the file and execute ghost restart so the CMS can recognize the new settings and apply it.
7. After the restart finishes, check the Settings page within your Ghost admin area, available at https://url-of-your-site/ghost/#/settings.
In there you will find the following info box, after clicking on About Ghost:
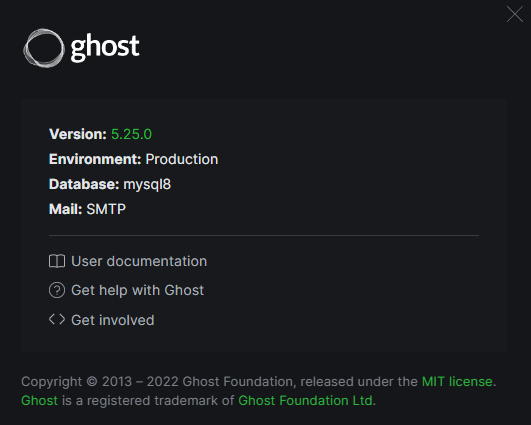
If you successfully configured the SMTP server, it will say SMTP under the Mail header.
You don't pay any extra for the usage of these links.
Thank you for supporting the author and this blog!