A quick look at Jira Automation with examples


Introduction
Jira by Atlassian is a powerful tool to plan, track and support software development projects and software developers with Jira Software or ITSM and helpdesk teams with Jira Service Management.
However, this tool, like many others, only fully comes to life if you define structured processes to live beforehand and implement plus automate them as much as possible so the users utilizing it day in, day out, are assisted in an optimal way and have a great experience.
So today, we will look at two examples for ITSM teams with which you can improve your ticketing workflow and increase customer satisfaction.
I advise you, dear reader, to read the examples in order because some groundwork, like ticket states and ticket workflows, will only be explained in Example 1.
Prerequisites
To be able to follow the steps outlined in this post you need the following:
- An Atlassian Access Login or External Login with Single-Sign-On to an active Jira Cloud or Jira Data Center instance with Service Management features enabled
- At least one project to which you have the necessary permissions to access the Automation blade in Jira Cloud or the Project Automation blade in Jira Data Center within the Project Settings
- (A) functioning workflow(s) within that project
- Different issue types set up and connected to the workflow(s)
Example 1: Create an automated comment (with an email notification) if a ticket is waiting for feedback
In this example we will assume that the ticket workflow for a service request looks like this:
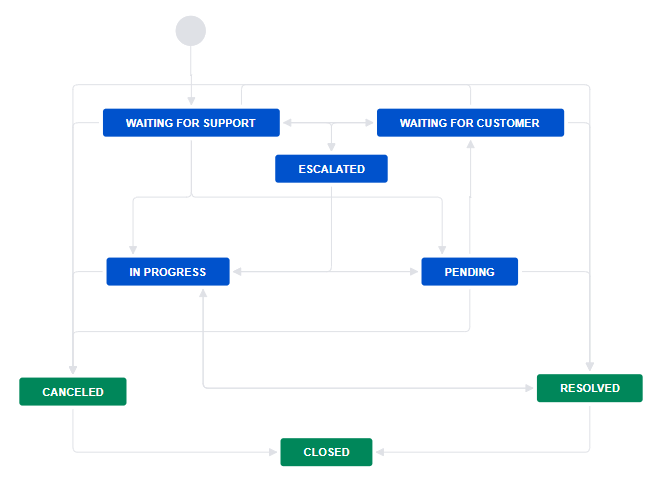
We will focus on Waiting for Customer. We can arrive in that status by coming from different other states but the important two in this case are Waiting for Support and Pending.
Waiting for Support means that in the past, the customer has provided additional information not present during the creation of the ticket to the helpdesk engineer which was needed to proceed with the ticket, and the ball is now again with the engineer to either continue working on the ticket, in which case the ticket gets transferred to In Progress, or again ask a question back to the customer, in which case the ticket will get the status Waiting for Customer.
Pending is a very temporary status, which can either happen if a ticket is in backlog or because the ticket should be transitioned to Waiting for Customer.
So we now know how different use cases look like and how we can get to Waiting for Customer. When we arrive at that status however it is obvious the customer has to be informed that he has to do something and in turn feedback should be provided by him.
How do we configure an automated comment so the customer will be informed when the ticket gets to Waiting for Customer?
I first want to establish a basic understanding of the premise of the needed automation so I sketched out the workflow:
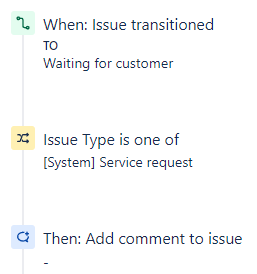
We need a trigger, a condition and an action.
To go forward and create this rule, go to the Project settings of your chosen project where the automation should be run, open the Automation blade (Jira Cloud) / Project Automation (Jira Data Center) and click on Create rule.
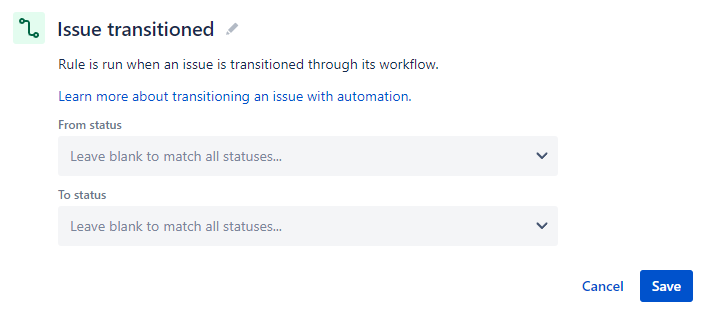
We are presented with an empty editor to set the different dials for the automation rule. It starts by asking us for a trigger. Here we select Issue transitioned under the Issue triggers category to arrive at this form:
Since our ticket can get to Waiting for Customer from many different states based on our workflow, we will just configure the To status field from the dropdown:
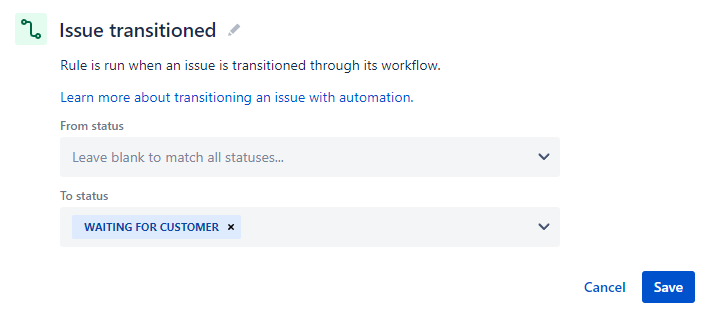
Now we can Save.
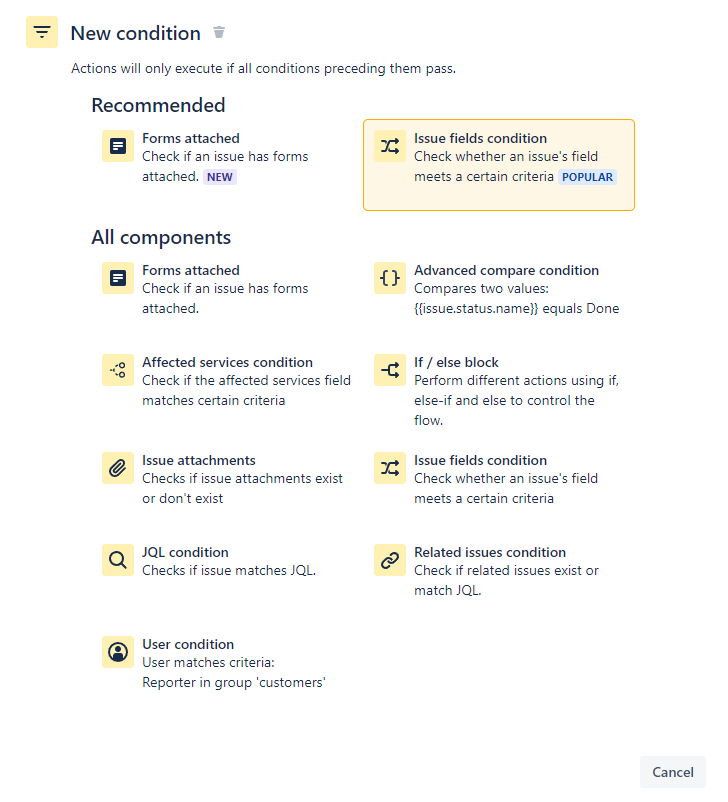
This drops us to Add component, where we select New condition:

We need the condition Issue fields condition from the Recommended section.
In there we will limit the automation to just Service requests for now. When you have a solid understanding of your workflows and processes, feel free to adjust this to your liking and business needs.
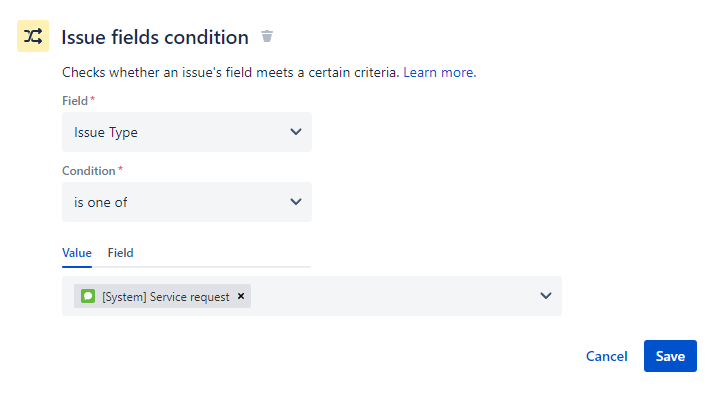
Again, we Save.
And finally, we configure the action:

For this, we want to create a comment, so select Comment on issue under Issue actions and this form opens:
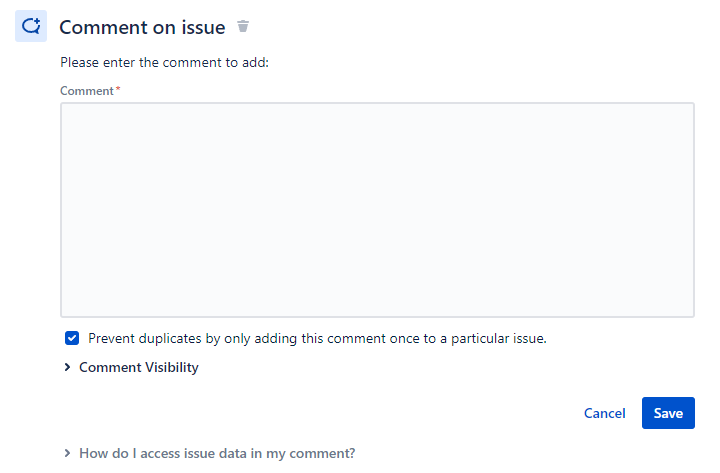
Now we just need a helpful and friendly comment which informs everyone what is needed. In here, use a company helpdesk template or cook something up yourself. Be sure to include the variable [~{{reporter}}] in the greeting so the ticket author gets tagged and receives a Jira notification plus an email that he was mentioned in the ticket.
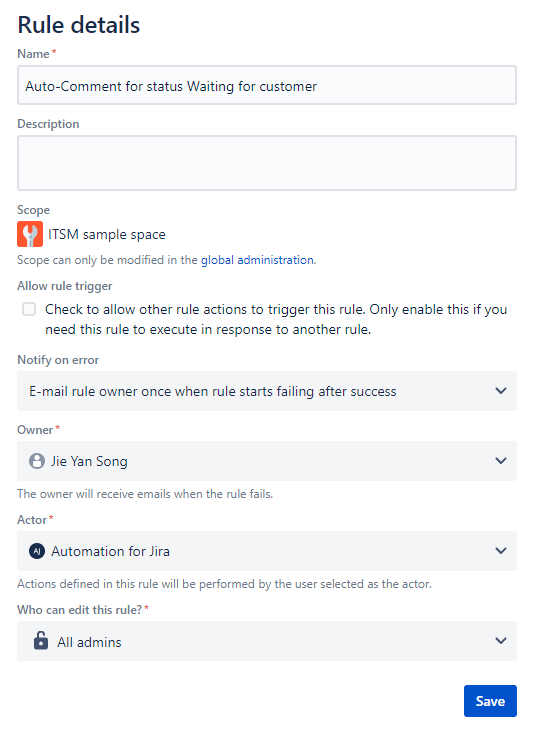
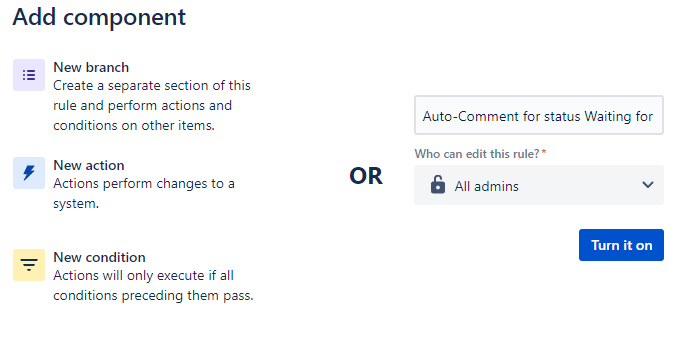
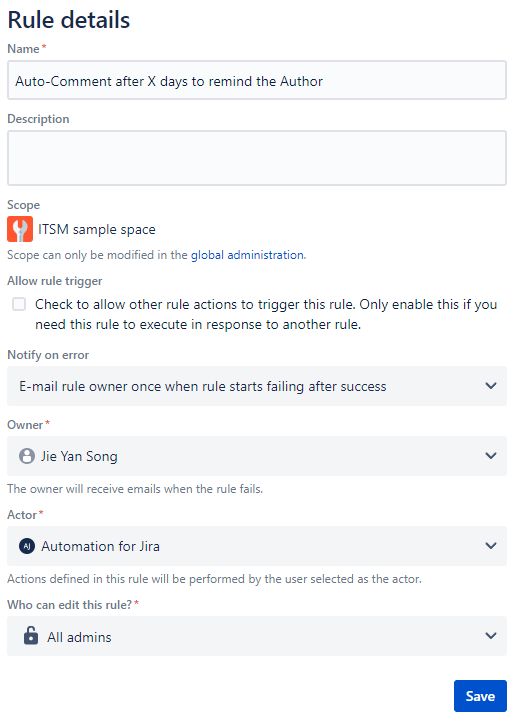
All that needs to be done now is Save this action form and configure the Rule details. You can configure these based on the following best practice values, just make sure to configure the Owner to your liking:
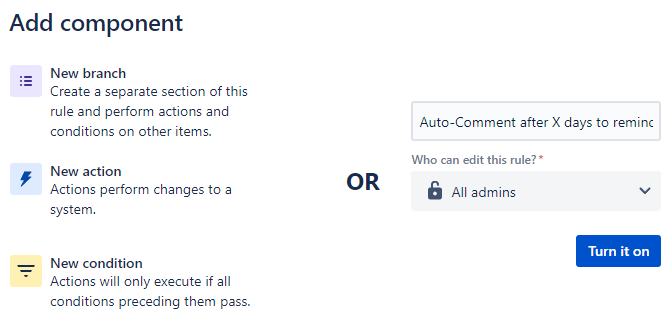
Save again and now you are ready to publish the rule and Turn it on:
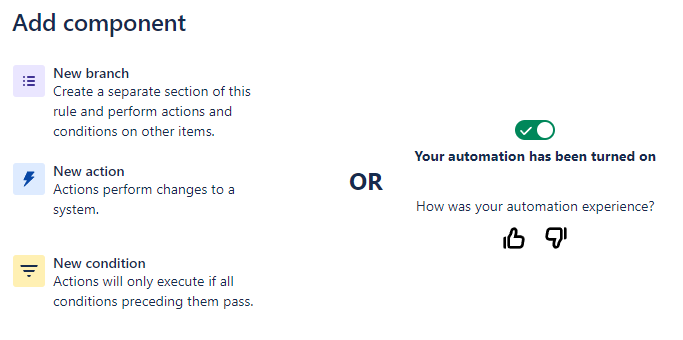
With that you have successfully configured your automation, congrats!
Example 2: Create an automated comment (with an email notification) after X days if a ticket still hasn't received feedback
With the completion of Example 1 your project now has an automation set up so each time a ticket arrives in Waiting for Customer, a comment notifying the author of the status is created.
Lets take it one step further; sometimes (or often, it depends ;) ) authors of tickets take their time or forget about providing feedback, so the ticket is staling and is not attended to for extended amounts of time, which is not good for ticket KPIs and engineer ticket queues.
So let's fix that by creating another automation which will post a reminder comment after X days so the author gets reminded about the outstanding task.
Here is the workflow sketch:
We need a trigger, two conditions and an action.
Once again, go to the Project settings of your chosen project where the automation should be run, open the Automation blade (Jira Cloud) / Project Automation (Jira Data Center) and click on Create rule.
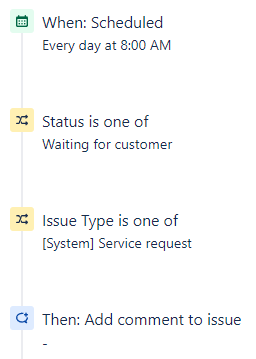
For the trigger, select Scheduled under the Scheduled category.
Then configure the Schedule like this:
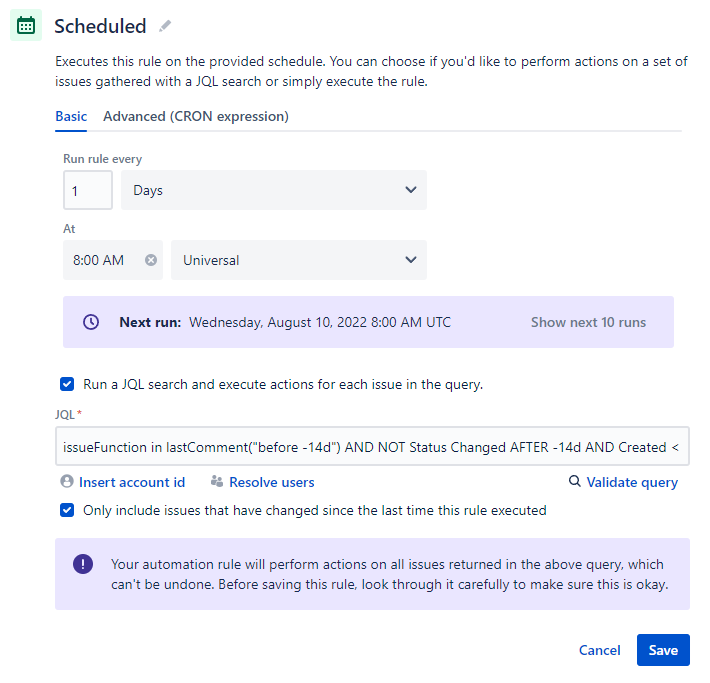
The schedule should run daily, so Run rule every is set to 1 Days.
The time at which the automation will run can be customized, in my example it will run at 08:00 AM UTC, so at the (assumed) start of each (work) day, including weekends, because Jira (still) has no simple way to filter out non-work days [A/N: Rant opportunity for another day :) ].
The most important part is the JQL which tells the schedule which issues to select for processing and therefore post a comment to. Here it is again in full since it gets cut off in the screenshot:
issueFunction in lastComment("before -14d") AND NOT Status Changed AFTER -14d AND Created < -14d
I will explain each section separately:
issueFunction in lastComment("before -14d")checks if any comment has been posted 15 or more days ago. Or, explained in another way, if no comment has been posted in the last 14 days, the check states true and continuesANDis an operator which connects two statements. This one will make sure that the two check statements before & after theANDare fully evaluated and any issue that should fit the statement has to pass both checksNOT Status Changed AFTER -14dchecks if the status of the ticket didn't change in the last 14 daysAND, same as 2.Created < -14dchecks that the ticket is older than 14 days
This JQL statement uses 14 days for all checks, so only if all checks tell the system that the selected ticket hasn't been touched in 14 days (no new comment, no status change and older than 2 weeks), a comment will be created. If you want to post a reminder 7 days after the transition, then change all 14's to 7's.
Save and we continue with the first condition:
Here we will check that the ticket is still in the status Waiting for Customer:
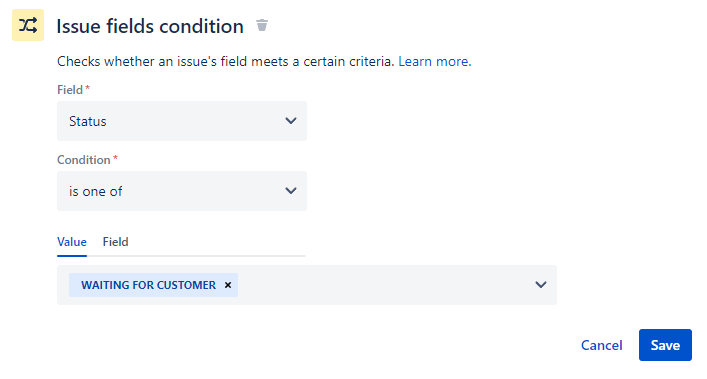
Save and then add the second condition, once again an Issue fields condition:
You should recognize this second condition, since we also used it in Example 1, it checks for specific issue types.
Save and now comes the last component, the action which posts the friendly and helpful comment:
Again, we need a helpful and friendly comment which informs the author of their outstanding task. In here, use a company helpdesk template or cook something up yourself. Be sure to include the variable [~{{reporter}}] in the greeting so the ticket author gets tagged and receives a Jira notification plus an email that he was mentioned in the ticket.
All that needs to be done now is Save this action form and configure the Rule details. You can configure these based on the following best practice values, just make sure to configure the Owner to your liking:
Save again and now you are ready to publish the second rule and Turn it on:
With that you have successfully configured this automation as well, treat yourself to a cookie and a nice cup of coffee or tea!
Conclusion
With the help of this post you have implemented two important automations for ITSM teams to make the day-to-day tasks a bit less tedious and better standardized.
I hope this excursion gave a satisfactory introduction to the world of Jira Automation and the near endless possibilities that come with it.
Do you wish I would cover any additional helpful automation rules? Let me know down in the comments and I will either publish another post about these or set up a 1:1 session with you so we can look at your requirements and implement the appropriate rules.
You don't pay any extra for the usage of these links.
Thank you for supporting the author and this blog!